In my previous post, How to Install OEL 6.4 as a VirtualBox Guest, we got Oracle Linux up and running on VirtualBox. In this post, we continue with the Oracle database. Installing Oracle on Linux can be frustrating if you don’t do all the necessary pre-installation steps, but with the right preparation, it’s a piece of cake.
Audience
Damn it, Jim, I’m a software engineer, not a systems administrator!
This post is for developers who want to learn about Oracle Spatial and Graph. It assumes that you are comfortable using Linux and that you are familiar with RDBMS software. Many of the steps in this post are done at a Linux command prompt. This post looks long because I included all the screenshots, but in reality ,there are not that many steps to perform.
Let’s Get Started
Oracle Spatial and Graph is built into Oracle Database Enterprise Edition. It is not part of the Standard Edition. At the time of this writing Oracle 12c has not been released, so we’ll be using 11g. I’ll do an addendum post when 12c is available. Most of what you need to know about installing Oracle 11g Enterprise Edition on Oracle Enterprise Linux 6.4 can be found at the following link. Take a moment to browse that article and search for some of the other installation instructions that are out there.
http://www.oracle-base.com/articles/11g/oracle-db-11gr2-installation-on-oracle-linux-6.php
The remained of this post shows the steps that worked for me following the post above and other web resources.
Preparing the OS for 11g
There are a number of steps necessary to prepare for the Oracle installation, including setting up the hosts file, installing dependency libraries, adding the oracle user and group, adding directories, defining environment variables and changing the SELINUX permission. Much of this work is handled by a pre-installation package released by Oracle. If you do all the prep work correctly the database installation is straightforward. I had a few false starts because of missing some of the prerequisites described below.
Host Name
Use the hostname command to check your hostname. If you want to change it, now is the time. Whether or not you change the name, make sure that the system hostname is correctly defined in /etc/hosts/ for the loopback test during the database installation.
Edit the /etc/sysconfig/network file as the root user if you want to switch the host name Set the HOSTNAME property to the desired name.
NETWORKING=yes
HOSTNAME=gps11g.localdomain
Be sure that the hostname is defined in the /etc/hosts file. I’m using a static IP address, so that is what I put in the hosts file. If you are using DHCP then add the host name to the first two lines instead.
127.0.0.1 localhost localhost.localdomain
::1 localhost localhost.localdomain
192.168.1.39 gps11g gps11g.localdomain
Installing Library Dependencies
There are numerous library dependencies that must be installed to support 11g on OEL 6.4. Oracle released an RPM package that takes care of these for you, as well as creates the oracle user and home directory. The RPM is documented here:
http://www.oracle.com/technetwork/articles/servers-storage-admin/ginnydbinstallonlinux6-1845247.html
Switch to the root account and run the command below to install the preinstall package.
# su - root
# yum install oracle-rdbms-server-11gR2-preinstall
...
Complete!
When that completes, do a full update just for good measure.
# yum update
Assign a password to the oracle user.
# passwd oracle
Change the secure Linux policy in /etc/selinux/config to permissive. Do not change any another setting in the file. I emphasize the point because I carelessly changed the wrong property which caused a kernel panic after I rebooted.
# This file controls the state of SELinux on the system.
# SELINUX= can take one of these three values:
# enforcing - SELinux security policy is enforced.
# permissive - SELinux prints warnings instead of enforcing.
# disabled - No SELinux policy is loaded.
SELINUX=permissive
# SELINUXTYPE= can take one of these two values:
# targeted - Targeted processes are protected,
# mls - Multi Level Security protection.
SELINUXTYPE=targeted
Reboot the server after completing this change.
Install Oracle Enterprise Edition 11g
Download the two installation zip files for Oracle EE 11g: http://www.oracle.com/technetwork/database/enterprise-edition/downloads/112010-linx8664soft-100572.html.
As root, create the directory shown below, and unzip both files into that directory.
# mkdir /home/OraDB11g/
# cp [your path]/linux.x64_11gR2_database_1of2.zip /home/OraDB11g/
# cp [your path]/linux.x64_11gR2_database_2of2.zip /home/OraDB11g/
# cd /home/OraDB11g/
# unzip linux.x64_11gR2_database_1of2.zip
# unzip linux.x64_11gR2_database_2of2.zip
Add Permission for Oracle User to xhost
Next, to avoid a common display error during the Oracle 11g installation run the following command as root.
# xhost +SI:localuser:oracle
  localuser:oracle being added to access control list
Edit /home/oracle/.bash_profile with your preferred editor and add the following environment variables.
# Oracle Settings
TMP=/tmp; export TMP
TMPDIR=$TMP; export TMPDIR

ORACLE_HOSTNAME=gps11g.localdomain
ORACLE_UNQNAME=orcl
ORACLE_BASE=/home/oracle/app/oracle
ORACLE_HOME=/home/oracle/app/oracle/product/11.2.0/dbhome_1
ORACLE_SID=orcl
export ORACLE_SID ORACLE_HOME ORACLE_BASE ORACLE_UNQNAME ORACLE_HOSTNAME
PATH=$ORACLE_HOME/bin:/usr/sbin:$PATH
export PATH
LD_LIBRARY_PATH=$ORACLE_HOME/lib:/lib:/usr/lib
CLASSPATH=$ORACLE_HOME/jlib:$ORACLE_HOME/rdbms/jlib;
export CLASSPATH LD_LIBRARY_PATH
Switch to the oracle user and change to the OraDB11g directory to run the install.
# su - oracle
# cd /home/OraDB11g/database
# ./runInstaller
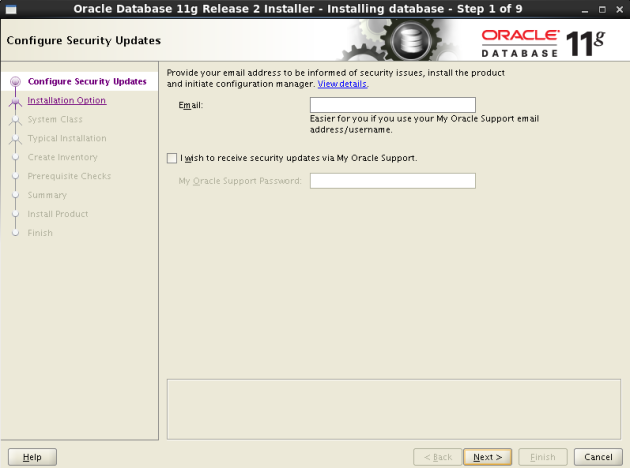
Once the installer opens you will be presented with the screens below. Since we are building an instance just for learning you may simply accept the default values on most screens. Leave the first-page blank unless you have an Oracle Support account.
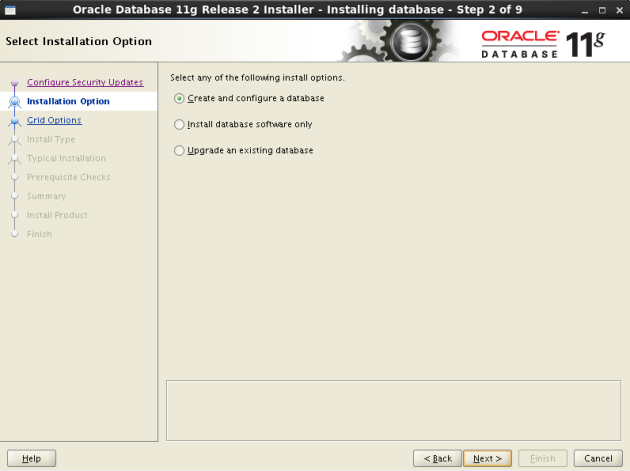
Select the option to create and configure a database.
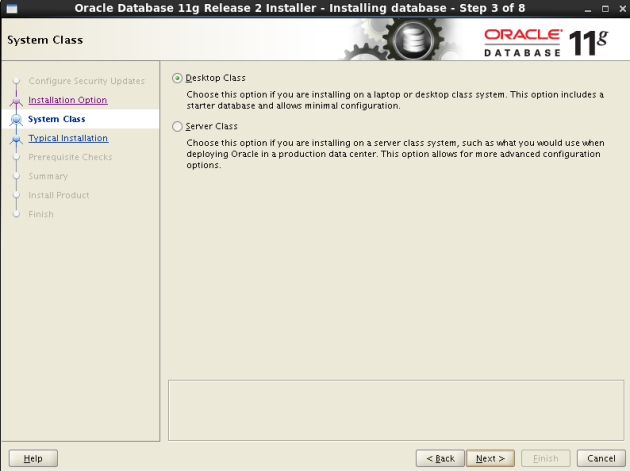
Choose Desktop Class on the next page.
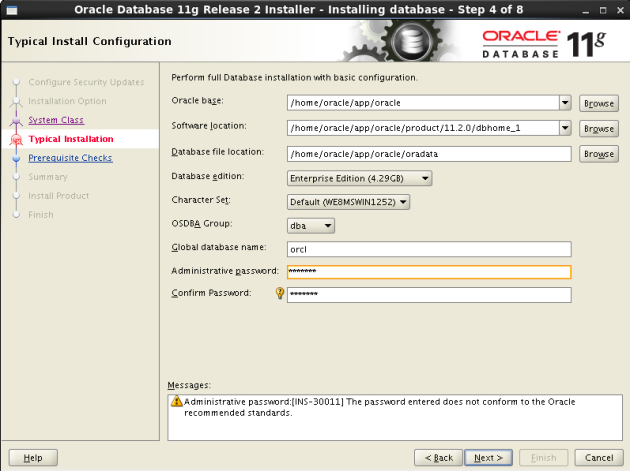
Provide an administrative password, and accept the default values in the other fields.
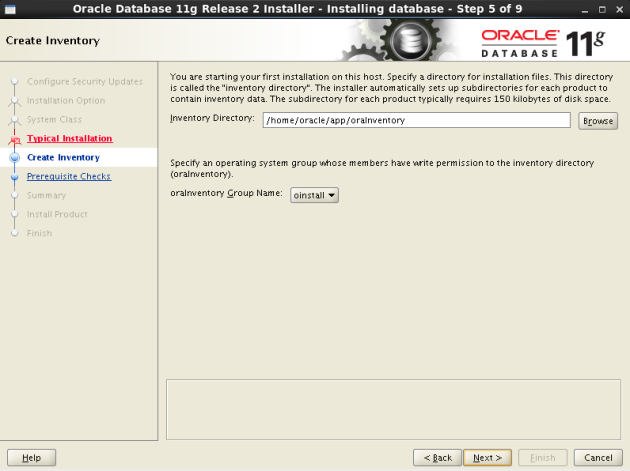
Use the default inventory location.
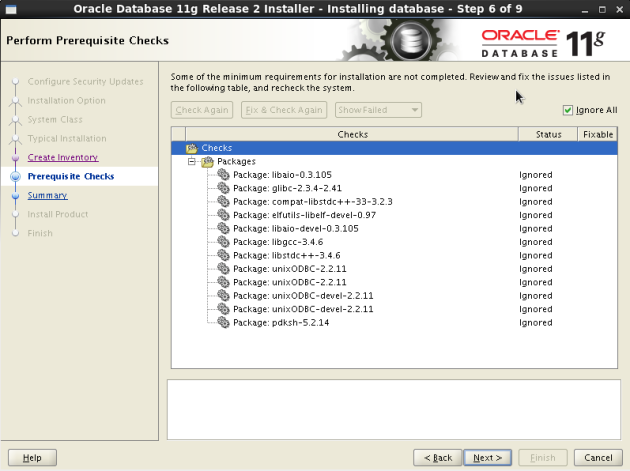
Despite having installed the prerequisite RPM provided by Oracle, you will still be warned of missing packages. I did a little digging, and in my case, it said I was missing libaio-0.3.105, but my system had libaio-0.3.107. I selected the “Ignore All” option at the top of the page and continued.
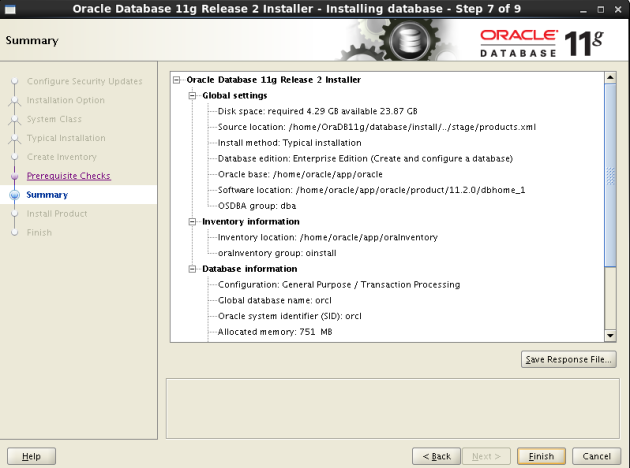
When the summary page appears, click Save Response File to keep a record of what is being installed on your system and then continue.
Now is a good time to go get some coffee. The installation will run for awhile.
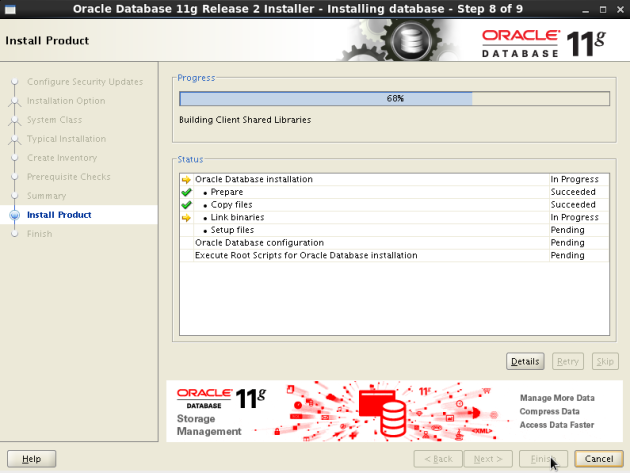
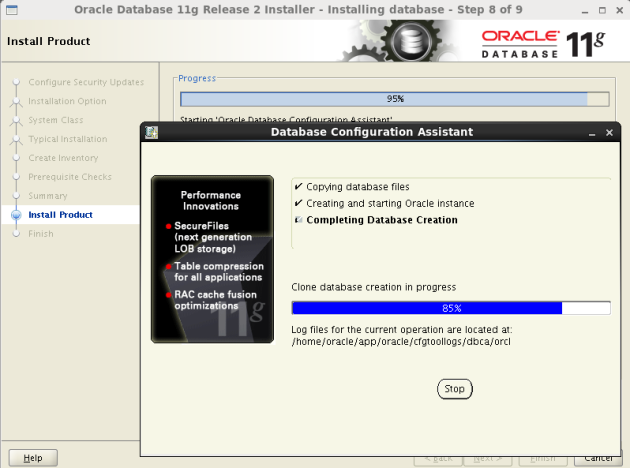
If you picked the configure database option on the second page then next you will see the configuration assistant launch. This too will run for quite awhile.
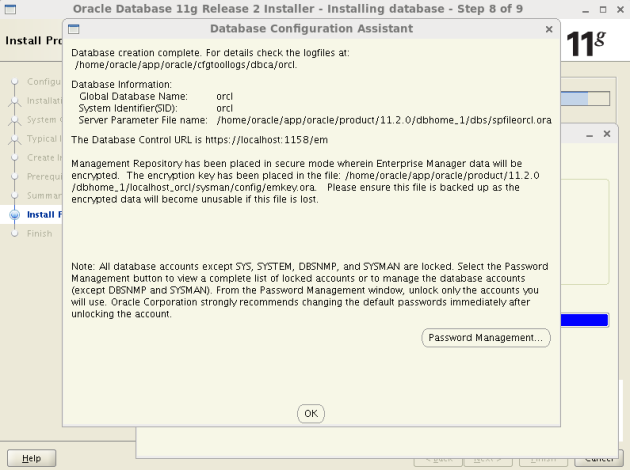
When the configure assistant finishes you will see this page showing your database SID and other information.
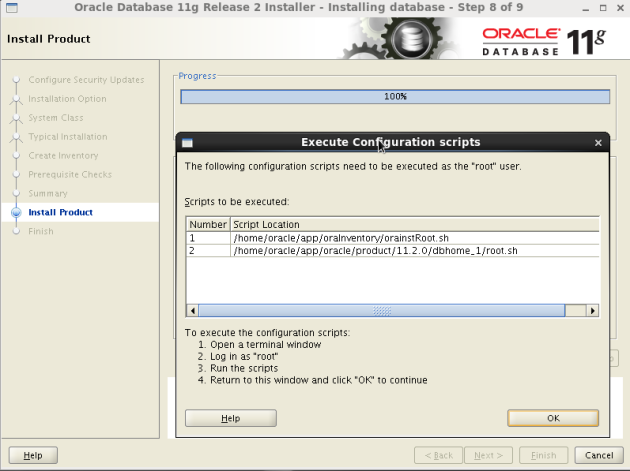
The final step is to switch back to root and run the two scripts shown.
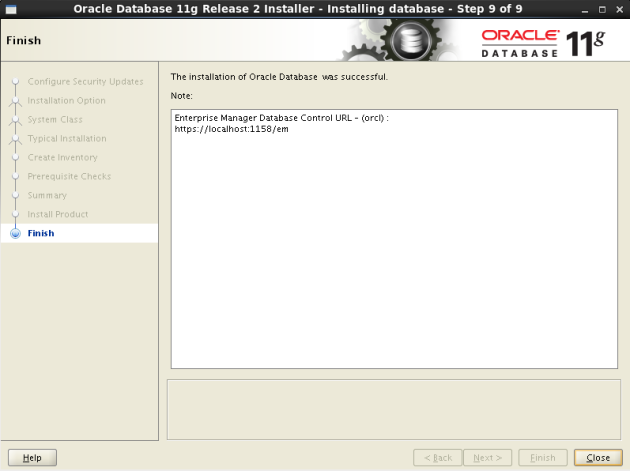
The final page provides the Enterprise Manager Database Control URL.
Test the Oracle Installation
Try connecting to the database while still signed in as the user oracle using the commands shown below. Run the test query shown to pull back the database SID.
$ sqlplus / as sysdba

SQL*Plus: Release 11.2.0.1.0 Production on Sat Jun 1 10:30:44 2013

Copyright (c) 1982, 2009, Oracle.  All rights reserved.

Connected to:
Oracle Database 11g Enterprise Edition Release 11.2.0.1.0 - 64bit Production
With the Partitioning, OLAP, Data Mining and Real Application Testing options

SQL> select instance_name from v$instance;

INSTANCE_NAME
----------------
orcl

SQL> exit
Disconnected from Oracle Database 11g Enterprise Edition Release 11.2.0.1.0 - 64bit Production
With the Partitioning, OLAP, Data Mining and Real Application Testing options
Starting Oracle
With no further changes, Oracle will not start automatically after a reboot. The example below shows how to start Oracle from SQLPLUS using the startup command. You can shutdown Oracle from SQLPLUS with the shutdown command.
# su - oracle

# sqlplus /nolog

SQL*Plus: Release 11.2.0.1.0 Production on Sat Jun 1 13:12:36 2013

Copyright (c) 1982, 2009, Oracle.  All rights reserved.

SQL> connect / as sysdba
Connected to an idle instance.
SQL> startup
ORACLE instance started.

Total System Global Area  776646656 bytes
Fixed Size            2217384 bytes
Variable Size          482347608 bytes
Database Buffers      289406976 bytes
Redo Buffers            2674688 bytes
Database mounted.
Database opened.
SQL>
Automating Restart
Setting up the automatic restart of Oracle is beyond the scope of this post. Instructions can be found here:
http://docs.oracle.com/cd/E11882_01/server.112/e25494/restart.htm#BABGIGDB
What’s Next
In my next post, we’ll set-up SQL Developer and Oracle Map Viewer and test out some basic spatial SQL.


